The purpose of the Risk dialog box (i.e., creation, modification, read-only) differs depending on the way it is accessed.
The dialog box is made up of:
A header, which provides the Risk's key information and commands,
A common section, which is always displayed and provides the main commands and attributes, and
A series of optional sections that can be added by using the buttons located on the right-hand side of the dialog box.
To remove an optional section, the user has to delete all the existing objects it contains first (if any).
In cases where the Risk dialog box is used to create a new Risk, the following buttons will be available in the bottom right section of the dialog box:
Done – Allows the user to complete the Risk creation and closes the dialog box.
Done & New – Validates the Risk creation and opens a new Risk dialog box for the user to create the next Risk.
Cancel – Closes the dialog box without creating the Risk.
The upper section of the dialog box provides the Risk Key, Level, Name, and Workflow State as well as the following tools:
 | Workflow Actions | Allows the user to change the Risk Workflow State. |
 | Flag | Allows the user to mark the Risk as flagged. |
 | Notes | Indicates whether there are new notes or not, and displays the Notes dialog box. |
 | More | Provides access to the following commands:
|
In addition, the following attributes are displayed:
Owner | Indicates the person in charge of handling the Risk. The following actions are possible:
|
Parent | Indicates the Parent Object (Project, Work package, or Portfolio) the Risk is attached to. By using the Move feature, the user can change a Parent object. |
Type | Indicates the Type of the Risk. The following actions are possible:
|
Estimated Date | Date on which the Risk might materialize. By default, the Estimated Date is automatically filled in as follows (from highest to lowest priority):
|
Actions | Indicates the number of closed Actions as opposed to the total number of Actions attached to the selected Risk. |


The main section provides the following fields:
Name | Name of the Risk |
Type | Type of Risk. Risk Types are defined by the Administrator in the System Data workspace, Work Objects tab. |
Link | Allows the user to enter a URL link regarding the Risk. He/she can then click on the arrow icon to open the link in a new browser tab. |
Related Task | Allows the user to attach the Risk to a task. In doing so, the Risk will then be available in the Gantt side panel, Work Objects tab. The following alerts can be displayed:
|
Due Date | Date on which the Risk should be addressed. |
Estimated Date | Date on which the Risk might materialize. By default, the Estimated Date is automatically filled in as follows (from highest to lowest priority):
Note The Estimated Date can be overwritten manually at any time. |
Impact Cost | Indicates how much the risk would impact the cost if the risk were to materialize. For Task Risks, this cost is taken into account when performing a Risk Simulation |
Impact Time | Indicates the delay the risk would create if it were to materialize. For Task Risks, this delay is taken into account when performing a Risk Simulation. |


In addition, the following icons indicating that an issue exists with a Risk date can be displayed:
 | Indicates that the Risk is open and that the Due Date falls before Today’s date. |
 | Indicates that the Risk is open and the Estimated Date falls before Today’s date. |
 | Indicates that the Risk is open and that the Estimated Date falls after the Due Date. |
The right-hand side of the view provides the number of Risk Factors defined for the selected Risk.
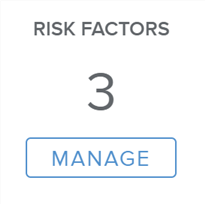
Upon clicking on the Manage button, the Risk Factors popup is displayed, allowing the user to define the identified Risk Factors.
The Current Risk Level section provides the Risk Level Indicators and the Risk Level as currently assessed.

The bottom right corner of the section provides the following buttons:
Manage Snapshots – Opens the Snapshot History popup.
Create Snapshot – Allows the user to capture the Current Risk Level.
If a Snapshot has been defined as the Initial value in the Snapshot History popup, then the Show Initial ( ) display option will be available in the top right corner of the section. Upon activating it, the Initial section will be displayed, showing the captured Risk Level indicators for the user to compare with the current values.
By clicking on the Edit button, the user is able to define other snapshot values as the Initial ones.
The Description and Cause sections provide Rich Text sections where the user can fill in information regarding the Risk.
The Mitigation section provides the Risk Level Indicators and the Risk Level as they would be if the Risk were properly mitigated.
The Copy to Current button allows the user to copy the Mitigated Risk Level Indicators in the Current Risk Level’s section fields.
A Rich text field is available for the user to describe the Mitigation Plan.
Clicking on the Mitigation Plan button opens the Mitigation Plan popup, allowing the user to define the items or Actions to be completed in order to mitigate the Risk (and, therefore, reach the Mitigated Risk level).
The Contingency section provides the Risk Level Indicators and the Risk Level as they would be once the Contingency Plan is executed.
A Rich text field is available to describe the Contingency Plan.
Clicking on the Contingency Plan button opens the Contingency Plan popup, allowing the user to define the items or Actions to be completed in order to limit the negative consequences of the Risk.
The Connections section provides information regarding the relationship between the selected Risk and other objects.
For more information regarding the possible connections available for a Risk, please refer to the Risks concept article, Risk Life cycle section.
Each connection is represented by a card, providing the following attributes of the connected object: Kind of object, ID, Type, Description, Assignee, and Workflow State.
The following tools are provided:
 | Create & Connect | Allows the user to create a new object that will be automatically connected to the current Risk. Note: If the Risk is closed, and if the “No further action” option was selected upon reaching the “Closed” Workflow State, then other connection options will be made available upon clicking on the “Create & Connect” command. |
 | Connect to Existing | Allows the user to connect the current Risk to another object. Note: The Backlog Item option will only be displayed if at least one Backlog Item exists for the selected project. |
| More | Provides access to the following commands:
|
The Actions section provides information regarding the relationship between the selected Risk and its Actions. The following Actions can be viewed and created:
Action (Mitigation) – If the “Risk Action” field of the Action has been defined as “Mitigation”
Action (Contingency) – If the “Risk Action” field of the Action has been defined as “Contingency”
Action – If the “Risk Action” field of the Action is left empty
For more information regarding the possible Action connections, please refer to the Actions concept article.
The following information regarding the connected Actions is displayed: Key, Type, Name, Assignee, and Status.
The following commands are available:
| Create & Connect | Opens the Actions dialog box where the user can create a new action that will be automatically connected to the selected Risk. |
| Connect to Existing | Opens the Global Actions list from which the user can select an existing action to be connected to the Risk. |
 | Remove Connection | Allows the user to delete the selected Action connection to the Risk. This command is only available if at least one relationship is selected (i.e., the corresponding checkbox is ticked). |
The Attachments section provides a spreadsheet where the user can attach information to the Risk in the form of URL links. Attachments can be of any type (i.e., spreadsheets, documents, images, etc.), and they are not saved in the Sciforma database.
The Attachments section is only displayed if the corresponding option has been activated by the Administrator in the System Settings workspace, Work Management Settings folder, Display Preferences tab.
The following attributes are available for viewing and editing: Type, Initiator, Name, and URL.
The following commands are available:
| New | Allows the user to create a new Attachment. |
| Connect to Existing | Opens the Global Attachments list from which the user can select an existing Attachment to be connected to the Risk. |
| Remove Connection | Allows the user to delete the selected Attachment relationship(s). This command is only available if at least one relationship is selected (i.e., the corresponding checkbox is ticked). |