The Gantt tab available in the Work workspace provides project managers with all the tools they need to schedule and track their projects.
The Gantt tab allows the user to:
Create a project, define its main attributes, define the WBS, add tasks, link tasks, and enter task constraints if necessary
Identify and create Hard or Soft assignments for each task
Identify and create Cost Item assignments for each task
Identify and assign Transactions for each task
Identify and assign Deliverables for each task
Review the resource assignments, adjust effort, and possibly resolve resource over-allocations
Review schedule issues and resolve them
Identify the potential risks/problems that may change the project scope and/or the Gantt chart schedule
Create dependencies with another project’s task
Present the project’s main stages and milestones to customers, sponsors, or stakeholders
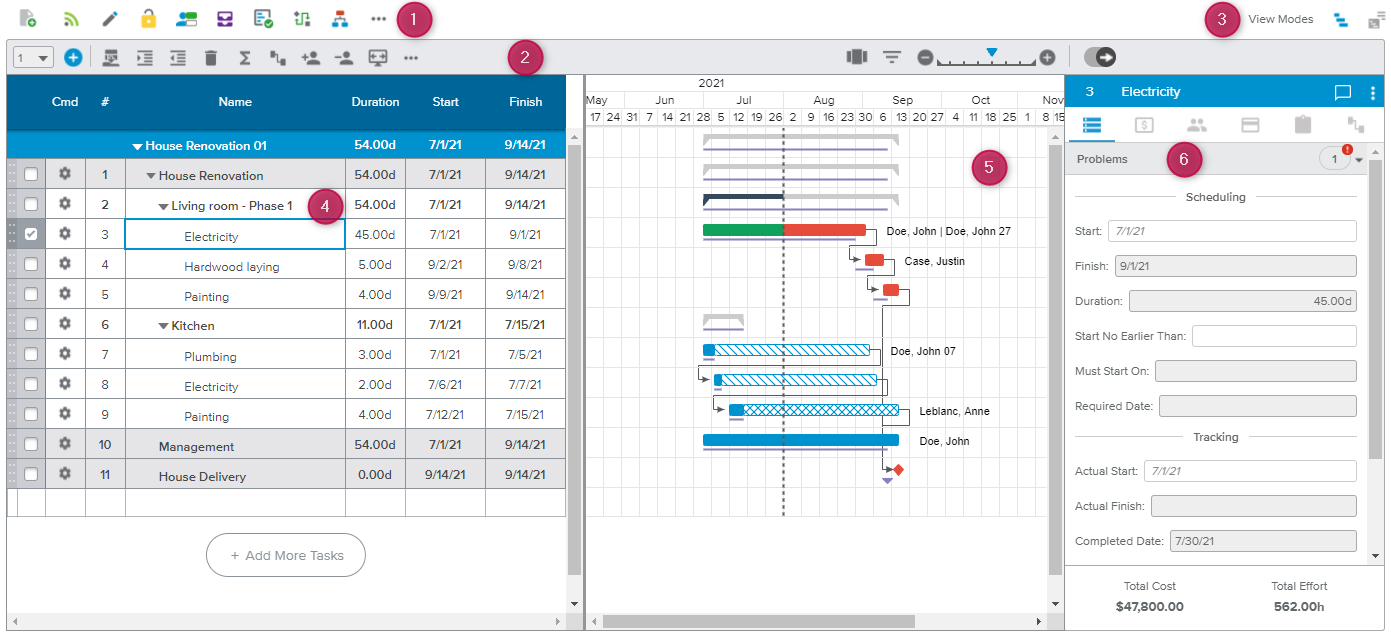
Apart from the Project Data Selector available on the left-hand side of the view, the Gantt tab is made up of different sections:
Main toolbar
Gantt toolbar
View Modes selection
Gantt spreadsheet
Gantt chart
Task Panel
NoteThe Project Problems panel is displayed when there is no task selected in the Gantt spreadsheet.
The main toolbar is located on the top of the view and aims at providing the most important project information and commands.
The display of the main toolbar differs depending on the tab currently selected and whether the project is locked or unlocked.
Here is the list of the buttons users can encounter in the Project workspaces:
 | New | Allows the user to create a new project. |
 | Publish | Publishes any changes to the current project, but only if the current project is the active Working version. |
 | Edit | Opens the Project Administration dialog box. |
 | Lock | Locks the project so that other users cannot modify it. Upon locking a project, the Undo and Redo commands become available. Note This command is only available if the project is not yet locked by any user. |
 | Unlock | Unlocks a previously locked project. Note This command is only available if the project has been locked by the logged-in user. |
 | Undo | Erases the previous change done, reverting the project to its previous state. Note This command is only available if the project has been locked by the logged-in user. |
 | Redo | Reverses the action of the Undo command. Note This command is only available if the project has been locked by the logged-in user. |
 | Manage Evaluation Snapshot | Opens the Evaluation Trend dialog box. |
 | Change Scoring Template | Allows the user to modify the Template that is used to score and describe the project. |
 | Update from Connected Idea | Allows the user to update the scoring and descriptions with the values of a connected Idea. |
 | Manage Baselines | Opens the Manage Baselines dialog box. |
 | Workflow Actions | Allows the user to modify the Workflow State Vote associated with the project. |
 | Workflow | Displays the Workflow Information dialog box. |
 | More | Provides access to the following commands:
|
 | Review Assignments | Opens the Assignments Scheduling full screen view. |
 | Status Report History | Opens the Status Report History full screen view. |
 | Notes | Indicates whether or not there are new notes, and opens the Notes dialog box. |
 | Switch to Tracking Mode | Enables users to switch from Planning Mode to Tracking Mode. Only available if the Schedule Method is Critical Chain. |
 | Switch to Planning mode | Enables users to switch from Tracking Mode to Planning Mode. Only available if the Schedule Method is Critical Chain. |
The Insert Tasks area gives users the opportunity to insert one or more tasks simultaneously into the project.

In order to insert some tasks, the user needs first to select the number of tasks that are to be created in the drop-down list, and then click on the Insert Tasks ( ) button.
The following options are available when inserting a task:
Insert Before | New rows for the newly created tasks will be inserted in the Gantt spreadsheet above the selected task at the same WBS level. |
Insert After | New rows for the newly created tasks will be inserted in the Gantt spreadsheet beneath the selected task at the same WBS level. |
Insert Children | New rows for the newly created tasks will be inserted as children in the Gantt spreadsheet beneath the selected task. If there are assignments on the new Parent task, then a pop-up will be displayed, warning the user that the assignments of the task will be deleted. |
If no task is selected when the Insert Tasks button is clicked, the new tasks created appear at the end of the list.
The commands available in this area may vary depending on the selected workspace or view mode. However, the most common commands are the following:
 | Insert Template | Allows the user to insert a Template as follows:
|
 | Indent | Allows the user to move the task one level lower in the WBS hierarchy. |
 | Outdent | Allows the user to move the selected task one level higher in the WBS hierarchy. |
 | Delete | Allows the user to delete the selected task(s). |
 | Summarize At Level | Allows the user to specify the level of detail (number of levels of descendant tasks) to display. |
 | Chain Link/Delink | Provides access to the Chain Link, Chain Delink, and Multiple Links commands. |
 | Assign Resources | Provides access to the following commands:
|
 | Remove Resources | Provides access to the following commands:
|
 | Scroll into View | Allows the user to scroll the selected task automatically into the visible area of the Gantt chart graphic pane. |
| More | Provides access to the following additional commands:
|
 | Critical Chain | The Critical Chain button is only available when the project Schedule Method is set to "Critical Chain". The following commands can be displayed: Define Critical Chain, Add Critical Chain Resource Links, Remove Critical Chain Resource Links, Insert Buffers, Update Buffers, Dissolve Buffers, CC Save Baseline (in Tracking Mode only), CC Remove Baseline (in Tracking Mode only), and Remove Critical Chain. |
Upon clicking the Filters ( ) button available in the Gantt toolbar, the following options can be displayed:
Open Filters Dialog | Opens the Filters dialog box, enabling users to select built-in filters for filtering project tasks. |
Pin Filters Panel | Displays the Filters side panel. |
Unpin Filters Panel | Hides the Filters side panel. |
Reset Filters | Deselects all the previously selected filters in both the Filters dialog box and the Filters side panel. |
The user may activate several filters at the same time. As a consequence, only tasks that meet all of the criteria selected will be shown in the Gantt chart.
Once a filter has been activated, the Filters () button turns blue ( ).
).
The Filters side panel (located on the right-hand side of the Gantt chart) aims at providing the same filters as the Filters dialog box at all times.
When the Filters side panel is pinned, the user cannot display other information in the Gantt side panel.
Upon clicking on the white More ( ) icon in the top right corner of the panel header, the following options can be available:
Unpin Filters Panel | Hides the Filters side panel. |
Reset Filters | Deselects all the previously selected filters in both the Filters dialog box and the Filters side panel. |
The Zoom Controls area allows the user to zoom in and zoom out in the Gantt chart graphic pane. In other words, it sets the time interval (e.g., year, month, week, etc.).

The Zoom Controls area is made up of three components:
 | Zoom Out | Allows the user to go to the next higher interval. |
 | Level of Zoom | Provides an indication of the current interval. |
 | Zoom In | Allows the user to go to the next lower interval. |
Users can click a tick in the middle section to jump to a corresponding interval.
It is possible to display or hide the side panel (located on the right-hand side of the Gantt) by using the switch button available in the Gantt toolbar.

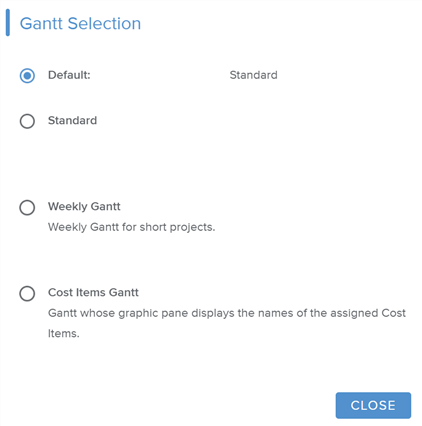
When the Administrator has set up some alternative Gantt charts, the Gantt selection ( ) button will be available. Upon clicking on it, the Gantt Selection popup is displayed, allowing the user to choose which Gantt view he/she needs.
Alternatives Gantt charts can be set by the Administrator in the System Settings workspace, Project Settings folder, Global Options tab, Gantt Preferences sub-tab.
The Gantt Selection popup displays the Default, Standard (as delivered by the Sciforma Solution), and additional (up to three) Gantt charts for selection.
The “Default” Gantt to be displayed can be defined in the Administration workspace, Setup tab, Activity Management section.
The Gantt tab offers two view modes:
 | Scheduler mode | Provides project managers with all the tools they need to schedule and their projects. |
 | Theater mode | Provides a powerful presentation capability when displaying information to team members, sponsors, customers, and stakeholders. |
The Gantt spreadsheet displays the following Tasks attributes: #, Name, Duration, Start, and Finish.
The Gantt chart Cmd (for Command) column provides the following Gear icons:
 | Gear | Indicates that the corresponding task is not linked to another object. |
 | Agile | Indicates that the corresponding task is linked to an Agile object. |
 | Dependency | Indicates that the corresponding task has an Inbound Dependency. |
 | Work Package | Indicates that the corresponding task is a Work Package. |
Upon clicking on the Gear button, the following commands are displayed:
Edit Task details | Opens the Task Details dialog box, allowing the user to view and edit all the selected task information. |
Mark Task as Closed | Checks the task Closed field. |
Mark Task as Opened | Unchecks the task Closed field (this command is only available if the task has previously been marked as Closed). |
Add Task to Watch list | Allows the user to review the task by using the Watch List built-in filter (Filters dialog box). |
Remove Task from Watch list | The Task will no longer be displayed when using the Watch List built-in filter (Filters dialog box). |
Disable Timesheet Add Assignment | Upon using this command, users will no longer be able to assign themselves to the task when using the Add Assignment command in the Timesheet workspace. |
Allow Timesheet Add Assignment | Upon clicking on it, users will be able to assign themselves to the task when using the Add Assignment command in the Timesheet workspace. This command is only available if the "Disable Timesheet Add Assignment" command has previously been used on the selected task. |
Create Agile Object | Allows the user to create a new Agile Object (Release, Iteration, or Epic) which will be linked to the corresponding task. |
Convert to Work Package | Displays the Convert to Work Packages popup, allowing the user to enter a Name and a Work Package ID for the new Work Package. |
Create Dependency | Displays the Create a New Dependency popup, allowing the user to select the Mapping Type and the relationship for the new Dependency to create. |
Create Sub-Project | Allows the user to create a new project with a Hierarchy Connection. Note The dates of the newly created project will be defined as follows: The Project Start Constraint will correspond to the Task Start date, and the Project Deadline will correspond to the Task Required Date. |
Tag Task | Displays the Tags dialog box, allowing the user to create project tags and add some of them to the currently selected task. |
For implicit task selection, the user clicks in one or several cells (using the Shift key or holding down on the mouse left button). To implicitly select tasks, the user must keep in mind the following:
The tasks are to be selected by clicking in the corresponding cell.
Commands will apply to the selected tasks.
The Copy and Cut capabilities will operate on the selected cells only.
It is only possible to select contiguous tasks. For instance, if there are five tasks that are numbered 1 to 5 in that order, it is not possible to implicitly select task 1 and task 4 at the same time.

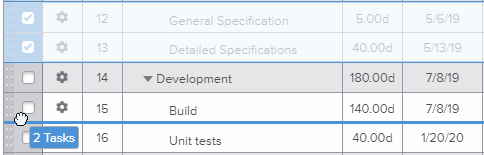
For explicit task selection, the user ticks the task checkbox located in the leftmost column of the spreadsheet. To explicitly select tasks, the following apply:
The tasks are to be selected (by ticking the checkboxes in the leftmost column).
Commands will apply to the selected tasks.
The Copy and Cut capabilities will operate on the entirety of the selected tasks.
It is possible to select tasks that are either contiguous or noncontiguous.

When tasks are explicitly selected, the background color of the checkbox cell (leftmost column of the spreadsheet) turns blue.
For browser security reasons, access to the user’s clipboard can be blocked, so we strongly advise using the keyboard shortcuts when copying and pasting information from another software to Sciforma, or from Sciforma to another software. The following shortcuts could be applied:
Copy: Ctrl + C
Cut: Ctrl + X
Paste: Ctrl + V
Copy, Paste, and Cut commands can still be used “within Sciforma” by accessing the built-in Context menu (right-click).
It is possible to create up to a hundred tasks at a time when using the copy/cut/paste commands.
Please note the following when pasting within a row of the Gantt chart:
If you paste in the last row (blank) of the Gantt chart, all copied or cut tasks are going to be added after the last task listed in the Gant.
If you paste several implicitly selected rows, make sure an equivalent number of empty rows has already been created. Otherwise, the existing rows that follow will be replaced by the pasted/inserted rows.
If you paste several explicitly selected rows, Sciforma will automatically create new rows for those tasks. They will be inserted above the selected task.
When pasting explicitly, assignments will also be copy-pasted.
Please do not forget that the copy, cut, and paste capabilities behave differently depending on whether the content has been implicitly (specific cells) or explicitly (entire row) selected.
The Drag & Drop capability allows users to change the position of one or several tasks in the Gantt. This operation is available for contiguous tasks only.
The user simply needs to hold down the left mouse button to grab the handle (grey part located on the left-hand side of a task checkbox) of the task or tasks selected.

As a consequence, a thick blue line appears on the spreadsheet, indicating where the selected task(s) are to be dropped. When dragging the tasks, the user can scroll to reach parts of the Gantt spreadsheet that are not within the immediate range.
Upon releasing the mouse button, the tasks are dropped to the selected position (represented by a thick blue line).
Pressing the Esc. key when performing a drag & drop will cancel the operation.
When the user does a right-click on the selected tasks, the following commands are displayed: Copy, Cut, Paste, Delete, Indent, Outdent, Insert Before, and Insert After.
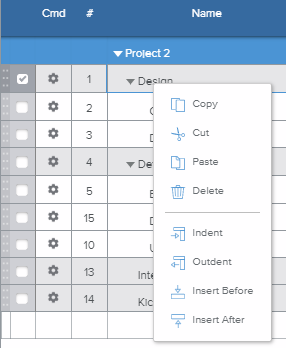
Please do not forget that the copy, cut, and paste capabilities behave differently depending on whether the content has been implicitly (specific cells) or explicitly (entire row) selected.
If several tasks are selected, the Insert Before and Insert After commands will specify the number of selected tasks. Clicking on the Insert before or Insert after commands will then insert an equal number of tasks.
Also, upon clicking on the “Add More Tasks” button located in the bottom of the spreadsheet, ten new task rows will be added at the end of the task list.
The Gantt chart is a graphical depiction of a project schedule. It's is a type of bar chart that shows the start and finish dates of several elements of a project that include resources, milestones, tasks, and dependencies.
The Gantt chart legend is the following:
Information | Corresponding Display |
|---|---|
Task on Critical Chain |  |
Parent Task |  |
Task with Total Float |
|
Task with Free Float |
|
Task with Negative Float |
|
Start Delay |
|
Completed portion of a task |
|
Task Baseline (Current Baseline) |
|
Milestone Baseline (Current Baseline) |
|
As of Date |
|
Start No Earlier Than |
|
Must Start On |
|
Required Date |
|
Deadline |
|


The Project Problems panel is displayed when there is no task selected in the Gantt spreadsheet and is made up of:
The Project Attributes section, which displays the project As of Date as well as the Current Baseline for the user to edit.
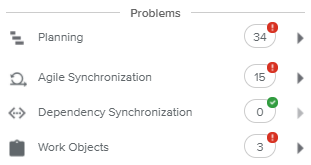
The Problems section, which displays for each problem category, the number of tasks experiencing the problem, with a red indicator if there are some existing problems, and a green one when there isn’t.
The Dependencies section (only available for projects whose Nature is "Program" or "Product). This section will display the dependencies if the project contains at least one task with a Dependency.
The Footer section, which provides access to the Project Brief dialog box.
The problems are listed by category, and upon selecting a category, the panel drills down to the corresponding problems panel.
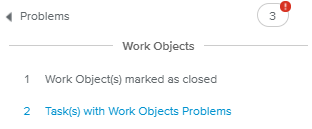
When reviewing the problems, the user can click on a specific problem to filter the corresponding tasks in the Gantt. The Problem label turns blue when the filtering is active:
The following Problem categories can be displayed:
 | Planning | Problems related to the scheduling and tracking of the project tasks. |
 | CCPM | Problems related to scheduling and tracking when the project’s Schedule Method is set to “Critical Chain”. |
 | Allocation Requests | Problems related to the Resource Allocations requested from Gantt Soft Assignments. |
 | Dependency Synchronization | Problems available when the Dependency feature is used. |
 | Agile Synchronization | Problems available when the Agile feature is used. |
 | Billing | Problems linked to the Billing feature. |
 | Work Objects | Problems available when the Work Management feature is used. |
The Project Problems are only displayed if the "Enable Project Problems in Right Panel" option has been activated by the Administrator in the System Settings workspace, Project Settings folder, Display Preferences tab, Project Work section. The details of the available problems can be set up in the following Problems sub-section.
When the user clicks on this problem category in the Project Problems panel, the Planning panel is displayed. Planning problems can be any of the following:
Task(s) not finished as expected | The task should be finished, meaning that it has an Actual Finish earlier than the As of Date and a % Completed less than 100%. |
Task(s) not started as expected | The task should be started, meaning that it has an Actual Start earlier than the As of Date and a % Completed equal to zero. |
Delayed task(s) | The task is not completed and the Finish date is later than the Baseline Finish. |
Task(s) with negative float | The task has some negative float. |
Task(s) not closed | The task is 100% completed, but its Closed field has not been selected (turned on). |
Task(s) with remaining effort in the past | The task has some Remaining Labor Effort before the As of Date. Note If no “As of Date” has been defined, the latest Completed Date of all the project Tasks will be taken into account instead. |
Task(s) finished before predecessors | The task finishes before at least one of its predecessors. |
Task(s) without baseline | The task has no current Baseline value. |
If the user clicks on the problem's name or number, the Gantt chart is filtered to display only the task(s) having the specific problem selected. The number of problems excludes the parent tasks. To deactivate the filters, the user can either click on the problem's name again or click on the blue Filters icon available in the Gantt toolbar and select the “Reset Filters” option.
When the user has clicked on this problem category, the Critical Chain problems panel is displayed.
CCPM problems are only available when the selected project's Schedule Method is set to "Critical Chaine".
The following CCPM Planning problems can be displayed:
Task(s) with Successor Link Type different than Finish-Start |
Task(s) with no Predecessor |
Task(s) with no Successor |
Critical Task(s) with Safe Duration greater than 2 × Duration |
Non Critical Task(s) with Safe Duration greater than 2 × Duration |
Task(s) with a Start No Earlier Than date |
Task(s) with a Start Delay |
Task(s) with no Assignment |
Parent Task(s) with Links |
Task(s) has Assignment(s) with Rate ≠ 100% |
The following CCPM Tracking problems can be displayed:
Task(s) not finished as expected | The task should be finished, meaning that it has an Actual Finish earlier than the As of Date and a % Completed less than 100%. |
Task(s) not started as expected | The task should be started, meaning that it has an Actual Start earlier than the As of Date and a % Completed equal to zero. |
Task(s) not closed | The task is 100% completed, but its Closed field has not been selected (turned on). |
Task(s) with remaining effort in the past | The task has some Remaining Labor Effort before the As of Date. |
Task(s) finished before predecessors | The task finishes before at least one of its predecessors. |
If the user clicks on the problem's name or number, the Gantt chart is filtered to display only the task(s) having the specific problem selected. The number of problems excludes the parent tasks. To deactivate the filters, the user can either click on the problem's name again or click on the blue Filters icon available in the Gantt toolbar and select the “Reset Filters” option.
When the user clicks on this problem category in the Project Problems panel, the Allocation Requests panel is displayed. The following allocation-related issues can be displayed:
Not Synchronized | Indicates that Total Effort of the Soft Assignment from which the Request was created is not aligned with the Requested Effort. Clicking on the “Edit Request” button opens the Edit Allocation Request dialog box, in which the “Sync” button will automatically align the Requested Effort with the Labor Assignment Total Effort. |
Not Accepted | Indicates that the Resource Manager defined a Resource for the Allocation Request, but the Project Manager has not accepted the allocation yet. The user can directly click on the “Accept” button to solve the issue or click on the “Edit Request” button to open the Edit Allocation Request dialog box. |
Not Answered | Indicates that the Resource Manager has not defined a Resource for the Allocation Request yet, and the corresponding Assignment Start date is fast approaching. Clicking on the “Edit Request” button opens the Edit Allocation Request dialog box. Settings The “Not Answered” alert is based on the value defined by the Administrator for the “Allocation Request Problem Granularity (days)” option (System Settings workspace, Resource Settings folder, Allocations & Commitments tab). |
Unread Notes | Indicates that the logged-in user has some unread Notes regarding the Allocation Request. Clicking on the “Edit Request” button opens the Edit Allocation Request dialog box, in which the Notes will be accessible. |
Each Dependency card provides the following information: Source Name, Target Name, Connection Type, Source Project’s Nature (if the connection is Project-to-Task), and Mapping Type.
The following commands are available:
 | Settings | Opens the Dependency Settings dialog box, allowing the user to modify the Mapping Type of the dependency and activate or deactivate the alerts. |
Brief | Opens the Source Object Brief dialog box. | |
Sync | Gives users the opportunity to synchronize the Source Object information with the Target Task. |
At the bottom of the panel, the Sync All button is displayed (if there is at least one Task out of sync).
The Agile Synchronization Problems show all the inconsistencies between the Agile objects coming from the Agile tab and tasks they are linked to in the Project. These inconsistencies are displayed in the form of Exception Reports cards.
The user can choose which types of alerts (Epics, Iterations, Releases, and/or Team Members) are to be displayed for the project by setting the Alerts Options in the Agile Advanced Attributes popup.
At the bottom of the Agile Synchronization panel, the Jump to Agile button is available, allowing the user to switch view to the Work workspace, Agile tab.
Tasks and Team Members need to be imported and the inconsistencies have to be resolved for the Tracking information to be available in the Execution, Timesheet workspace.
Iteration Exceptions | |
Iterations have no counterparts | No Iteration is identified in the Gantt, but Iterations exist in Agile. It is possible to Import All iterations or Import Selected ones (given a parent task is selected). |
Agile Iteration has no counterpart | An Iteration exists in Agile but is not represented in the Gantt. It is possible to Import (a new Task will be created in the Gantt) or Connect (only a parent Task can be identified as an Iteration.) |
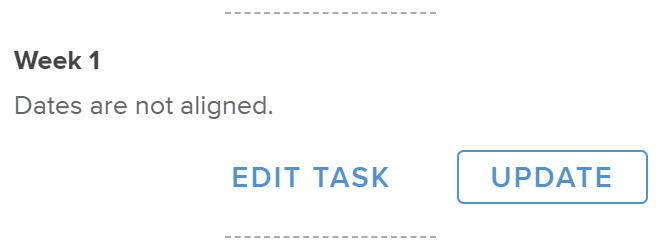
Dates are not Aligned | The Agile Target Start and/or Target Finish do not correspond to the Gantt Task Start and/or Finish dates. It is possible to use the Update Dates or Edit Task commands to resolve the inconsistency. |
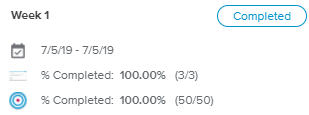
Iteration is not marked as completed | The Iteration Workflow State is other than “Completed” and the Gantt % Completed is equal to 100%. It is possible to use the commands Edit Task or Reset % Completed to resolve the inconsistency. |
Iteration is marked as completed | The Iteration Workflow State is “Completed” and the Gantt % Completed is below 100%. It is possible to use the Edit Task command to resolve the inconsistency. |
Release Exceptions | |
Agile Releases do not have any counterparts | No Release is identified in the Gantt, but Releases exist in Agile. It is possible to Import All (all the Agile Releases will be imported) or Import Selected (the user selects the Releases that need to be imported) to create the corresponding Milestones in the Gantt. (A parent task must be selected.) |
Agile Release has no counterpart | A Release exists in Agile but is not represented in the Gantt. It is possible to Import (a new Milestone will be created in the Gantt) or directly Connect (only a parent Task can be identified as a Release). |
Finish dates are not aligned | The Agile Target Finish is different than the Gantt Task Finish date. It is possible to use the commands Update Finish or Edit Task to modify the Gantt Task. |
Release is not marked as completed | The Release Workflow State is “New” and the Gantt % Completed is equal to 100%. It is possible to use the commands Edit Task or Reset % Completed to resolve the inconsistency. |
Release is marked as completed | The Release Workflow State is “Completed” and the Gantt % Completed is below 100%. It is possible to use the Edit Task command to resolve the inconsistency. |
Epic Exceptions | |
Agile Epics do not have any counterparts | No Epic is identified in the Gantt, but Epics exist in Agile. It is possible to Import All (all the Agile Epics will be imported) or Import Selected (the user selects the Epics that need to be imported) to create the corresponding task in the Gantt (given a parent task is selected). |
Agile Epic has no counterpart | An Epic exists in Agile but is not represented in the Gantt. It is possible to Import (a new Task will be created in the Gantt) or directly Connect (only a parent Task can be identified as an Epic). |
Dates are not aligned | The Agile Target Start and/or Target Finish do not correspond to the Gantt Task Start and/or Finish dates. It is possible to use the Update Dates or Edit Task commands to resolve the inconsistency. |
Epic is not marked as completed | The Epic Workflow State is “Completed” and the Gantt % Completed is equal to 100%. It is possible to use the Edit Task command to resolve the inconsistency. |
Epic is marked as completed | The Epic Workflow State is “Completed” and the Gantt % Completed is below 100%. It is possible to use the Edit Task command to resolve the inconsistency. |
Team Member Alerts | |
Gantt Iteration has no Team Members | It is possible to Import All Team Members or to Import Selected ones. |
Some Iteration Team Members have no counterparts | It is possible to Import All Team Members or to Import Selected ones. |
When the Billing feature is activated, the following problems can be displayed for Billable tasks:
Billable Task(s) not confirmed with Assignment | The task has at least one assignment, but has not been marked as “Confirmed”. |
Billable Task(s) not Billed in the past | The task’s Billable Date falls before the As of Date. |
Billable Task(s) with no Purchase Order | The Billable task has no Billing Status, and no Purchase Order is attached. |
If the user clicks on the problem's name or number, the Gantt chart is filtered to display only the task(s) having the specific problem selected. The number of problems excludes the parent tasks. To deactivate the filters, the user can either click on the problem's name again or click on the blue Filters icon available in the Gantt toolbar and select the “Reset Filters” option.
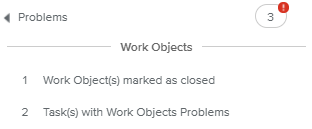
When the user clicks on this problem category in the Project Problems panel, the Work Objects panel is displayed. The following Work Object issues can be displayed:
Work Object(s) marked as closed | All Work Objects of a specific Task have reached their final Workflow State, while the corresponding task’s % Completed has not reached 100%. |
Work Object(s) not marked as closed | At least one Work Object has not reached its final state, and the related Task % Completed has reached 100%. |
Task(s) with Work Objects Problems | Number of Tasks with at least one Work Object-related problem (Planned Beyond Due Date, Overdue, Estimated in the Past). |
At the bottom of the panel, if the Planned beyond Due Date, Overdue, and/or Estimated in the past alerts are encountered, the following buttons are displayed:
Jump to Work Items | Switches the view to the Work workspace, Work Items tab. |
Jump to Risks | Switches the view to the Work workspace, Risks tab. |
The Task panel can display the following tabs:
 | Task Form | Provides the key scheduling, tracking, and baseline information for the selected task. |
 | Work Package | Provides the key attributes regarding the selected Work Package. |
 | Dependency | Provides information regarding the Source object of the selected task Dependency, as well as the corresponding synchronization data. |
 | Agile | Displays information regarding the Agile object linked to the selected task (i.e., Iteration, Release, or Epic). |
 | Billing | Provides the key Billing attributes of the selected task. |
 | Assignments | Allows the user to create and manage the labor assignments of the selected task, both soft and hard. |
 | Cost Items & Transactions | Allows the user to create and manage both cost items and transactions of the selected task. |
 | Work Objects | Provides information regarding the Work Objects (Actions, Deliverables, Change Requests, Issues, and Risks). |
 | Links | Allows the user to create and manage the selected task's Links. |
At the top of the panel, the header shows the task’s # and Name.

Upon clicking on the white More () icon, the following commands become available:
Edit Task details | Opens the Task Details dialog box, allowing the user to view and edit all the selected task information. |
Mark Task as Closed | Checks the task Closed field. Note Upon closing a Parent task, the user will be prompted to choose whether or not he/she wants to close the corresponding children tasks as well. |
Mark Task as Opened | Unchecks the task Closed field (this command is only available if the task has previously been marked as Closed). |
Add Task to Watch list | Allows the user to review the task by using the Watch List built-in filter (Filters dialog box). |
Remove Task from Watch list | The Task will no longer be displayed when using the Watch List built-in filter (Filters dialog box). |
Disable Timesheet Add Assignment | Upon using this command, users will no longer be able to assign themselves to the task when using the Add Assignment command in the Timesheet workspace. |
Allow Timesheet Add Assignment | This command is only available if the Disable Timesheet Add Assignment command has previously been used on the selected task. Upon clicking on it, users will be able to assign themselves to the task when using the Add Assignment command in the Timesheet workspace. |
Create Agile Object | Allows the user to create a new Agile Iteration, Epic, or Release which will be linked to the corresponding task. |
Unlink Agile Object | Allows the user to remove the link between the connected Agile Object and the corresponding task. |
Convert to Work Package | Displays the Convert into Work Package popup, allowing the user to enter a Name and a Work Package ID for the new Work Package. |
Create Dependency | Displays the Create a New Dependency popup, allowing the user to select the Mapping Type and the relationship for the new Dependency to create. |
Tag Task | Displays the Tags dialog box, allowing the user to create project tags and add some of them to the currently selected task. |
The bottom of the panel is called the Summary section and shows the Total Effort and the Total Cost of the selected task.
Upon clicking on the white Comments ( ) button, the Comments popup is displayed, allowing the user to create new Task Comments.
The button will be entirely white if there is at least one comment already posted.
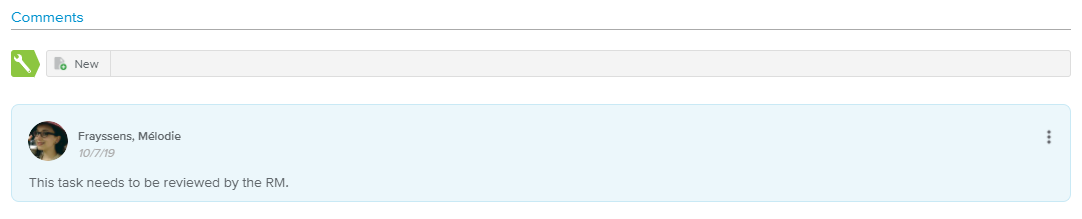
Each comment displays the following information: Picture or Initials of the user who posted the comment, name of the creator, Date of the comment, and the comment itself.
The following tools are provided:
New | Opens the New Comment popup, which provides a Rich text field wherein the user is able to add a comment. | |
| More | Provides access to the Edit and Delete commands that allow the user to manage the corresponding comment. Note These commands are only available for Comments that have been created by the Logged-in User. |
The Task Form () tab displays the key scheduling, tracking, and baseline information for the selected task. The fields available are different depending on whether the selected task is a task or a milestone.
The Problems section indicates whether the task has problems or not. This section can be expanded by clicking on the corresponding arrow ( ).
).

Once opened, it will display the problems encountered. For each problem, visual indicators (e.g., Cloud, Rain, or Thunderstorm icon) and/or values are provided to help the user understand the severity of the problems the task faces. The problems can be the following:
Remaining Effort before As of Date
 | The Remaining Effort before the As of Date represents 20% or less of the task’s Total Effort |
 | The Remaining Effort before the As of Date represents more than 20% of the task’s Total Effort |
 | The Remaining Effort before the As of Date represents more than 50% of the task’s Total Effort |
Negative float (for tasks that are not completed)
| The negative float represent 20% or less of the task’s duration |
| The negative float represents more than 20% of the task’s duration |
| The negative float is higher than the task’s duration |
Task has open risks
| One opened risk are attached to the task |
| Two opened risks are attached to the task |
| More than two opened risks are attached to the task |
Task is delayed by (for tasks that are not completed)
| The task’s delayed duration represents 20% or less of the task’s duration |
| The delayed duration represents more than 20% of the task’s duration |
| The delayed duration is higher than the task’s duration |
The Delayed Duration is calculated by comparing the task’s Finish and Baseline Finish dates. Only the Baseline 1 is taken into account in the calculation of the task’s delayed duration.
The other problems show only a Cloud () icon:
Task was not started as expected | The task should be started, meaning that it should have an Actual Start earlier than the As of Date, and it has a % Completed equal to zero. |
Task was not finished as expected | The task should be finished, meaning that it should have an Actual Finish earlier than the As of Date, and it has a % Completed less than 100%. |
Task finishes before at least one predecessor | The task Finish date is earlier than at least one of its predecessors’ Finish date. Note This problem does not apply to tasks with a Start-Start link Logic. |
Task is not closed | The task is 100% completed, but its Closed field is not selected (turned on). |
Task has no current Baseline | No current Baseline has been saved for this task. |
Billable Task(s) not confirmed with Assignment | The task has at least one assignment, but has not been marked as “Confirmed”. |
Billable Task(s) not Billed in the past | The task’s Billing Date is before the As of Date. |
Billable Task(s) with no Purchase Order | The Billable task has no Billing Status, and no Purchase Order attached. |
If the selected project Schedule Method is set to “Critical Chain”, the displayed problems are only CCPM problems.
The Tags section lists the currently selected task Tags. This section is only displayed if at least one tag has been assigned to the Task.
Upon clicking on the New ( ) command, the Tags popup is displayed, allowing the user to create project tags and add some of them to the currently selected task.
The following fields are available for viewing and editing: Start, Finish, Duration, Start No Earlier Than, Must Start On, Required Date, Actual Start, Actual Finish, Completed Date, % Completed, Baseline Start (read-only), and Baseline Finish (read-only).
The following fields are available for viewing and editing when a Milestone is selected: Start, Start No Earlier Than, Must Start On, Baseline Start, Actual Start, % Completed, and Duration.
Upon clicking on the Complete Milestone button, the % Completed is automatically updated to 100%. The Re-open Milestone button then becomes available in case the user wants to reset the % Completed to 0.
These sections can only be displayed when the project's Schedule Method is set to "Critical Chain".
The following fields are available for viewing and editing when a Project Buffer is selected: Duration, Safe Duration, Schedule Type, Buffer Calculation Method, Pin Date, Alert Date, Buffer Incursion, and Buffer Lock.
The Work Package () tab provides the following attributes regarding the selected Work Package: Work Package ID, Permissions, Workflow, and Manager.
The Dependency () tab is displayed upon selecting the task which is the target of a Dependency. These tasks can be easily identified in the Gantt spreadsheet thanks to the specific Gear () icon each holds.
The Dependency Source Object is represented in the form of a card.

The following information is displayed: Name, Workflow State, Manager 1, Health Score, % Completed, Total Effort, Baseline Effort, Total Cost, Baseline Cost, and last published date.
Clicking on the Source Project’s Name will open the corresponding Project Brief dialog box .
The following warning messages can be displayed to highlight the inconsistencies that are capable of preventing a proper dependency synchronization:
 | Project Target Start Constraint Issue | Indicates that the Start Constraint of the Target Project falls later than the Start and Finish Dates of the Source Project or Task. This warning is only displayed for Copy Dependencies. |
| Dates Outside Contract Dates | Indicates a gap between the Task and the Contract Dates. For this alert to be displayed, a hierarchy connection with a contract must exist between the two projects linked by the dependency. This warning is only displayed for Copy Dependencies. |
| The Task has Assignments | Indicates that some Resources and/or Cost Items have been assigned to the Target Task. This warning is only displayed for Copy Dependencies. |
 | Task dates are not aligned with synchronized dates | Indicates that the Target Task Start and Finish dates are different from the Image synchronized dates. The user can solve the issue by clicking on the Align button so that the Target Task dates will automatically reflect the Source dates. This warning is only displayed for Image Dependencies. |
The Synchronization Needs section provides the following Dependency attributes: Connection Type, Source Project’s Nature (if the connection is Project-to-Task), and Mapping Type.
In addition, the Settings gear button () allows the user to open the Dependency Settings dialog box, where he/she can modify the Mapping Type of the dependency and activate or deactivate the alerts.
The user can then review the Synchronization status of the following attributes: Start, Finish, Total Effort, Total Cost, and % Completed (or Completed Date, depending on the Default Task Synchronization).
The legend is as follows:
 | Red | Indicates that the data for the Source Object and the Target Object data differ. Both values will then be displayed. |
 | Green | Indicates that the data is properly synchronized |
The following commands are available at the bottom of the panel:
Unlink | Allows the user to delete the Dependency between the Source Object and the Target Task. |
Sync | Gives users the opportunity to synchronize the Source Object information with the Target Task. |
The Agile () tab is displayed upon selecting a task that has been linked with an Agile object (Iteration, Release, or Epic). These tasks can be easily identified in the Gantt spreadsheet thanks to the specific Gear () icon each holds.
Upon selecting a task linked to an Iteration, the following information will be displayed in the upper part of the panel: Workflow State, Start Date, Finish Date, % Completed (Backlog Items), and % Completed (Story Points).
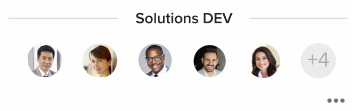
The Iteration Team section provides the team’s Name and features the pictures (or initials) of the first five Team Members (by Story Points assigned, and then alphabetically). If an Iteration Team contains more than five members, this section will then indicate the number of additional Team Members.
The user can click on the More () button located in the bottom right corner of the section to access the Team folder of the Iteration Details dialog box.
The Iteration Backlog section provides the number of Backlog Items by Type:
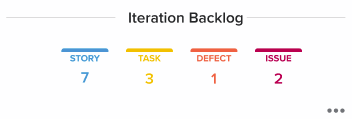
The user can click on the More () button located in the bottom right corner of the section to access the Backlog folder of the Iteration Details dialog box.
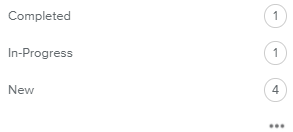
The Backlog Items per Status section provides the number of the Iteration Backlog Items per Workflow State. Upon clicking on this number for a specific status, the Board folder of the Iteration Details dialog box will be displayed, with the corresponding Workflow State selected in the Filters popup. The user can also click on the More () button located in the bottom right corner of the section to access the Board folder of the Iteration Details dialog box.
In addition, the following commands are available at the bottom of the panel:
Review Exceptions | Displays the Exception Reports popup, which allows the user to review the Agile Synchronization problems related to the selected Iteration. |
Unlink | Upon clicking on this command, the selected task will no longer be considered as an Agile object. |
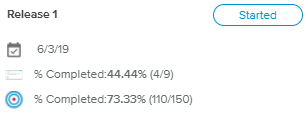
Upon selecting a task linked to a Release, the following information will be displayed in the upper part of the panel: Workflow State, Finish Date, % Completed (Backlog Items), and % Completed (Story Points).
The Release Backlog section provides the number of Backlog Items by Type:
The user can click on the More () button located in the bottom right corner of the section to access the Backlog folder of the Release Details dialog box.
The Backlog Items per Status section provides the number of the Release Backlog Items per Workflow State. Upon clicking on this number for a specific status, the Board folder of the Release Details dialog box will be displayed, with the corresponding Workflow State selected in the Filters popup. The user can also click on the More () button located in the bottom right corner of the section to access the Board folder of the Release Details dialog box.
In addition, the following commands are available at the bottom of the panel:
Review Exceptions | Displays the Exception Reports popup, which allows the user to review the Agile Synchronization problems related to the selected Release. |
Unlink | Upon clicking on this command, the selected milestone will no longer be considered as an Agile object. |
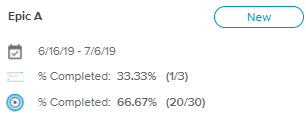
Upon selecting a task linked to an Epic, the following information will be displayed in the upper part of the panel: Workflow State, Start Date, Finish Date, % Completed (Backlog Items), and % Completed (Story Points).
The Epic Backlog section provides the number of Backlog Items by Type:
The user can click on the More () button located in the bottom right corner of the section to access the Backlog folder of the Epic Details dialog box.
The Backlog Items per Status section provides the number of the Epic Backlog Items per Workflow State. Upon clicking on the number for a specific status, the Board folder of the Epic Details dialog box will be displayed, with the corresponding Workflow State selected in the Filters popup. The user can also click on the More () button located in the bottom right corner of the section to access the Board folder of the Epic Details dialog box.
In addition, the following commands are available at the bottom of the panel:
Review Exceptions | Displays the Exception Reports popup, which allows the user to review the Agile Synchronization problems related to the selected Epic. |
Unlink | Upon clicking on this command, the selected task will no longer be considered as an Agile object. |
The Billing () tab provides the key Billing attributes for the selected task.
The Definition section provides the following fields: Billable, Confirmed, Purchase Order, Billing Date, Billable Amount, and Billing Status.
The Information section provides the following read-only fields: the project Billing Mode, and the task’s Billable Total Effort or Non Billable Total Effort depending on whether the task is billable or not.
At the bottom of the panel, the Total Cost and the Labor Revenues of the selected task are displayed.
The Assignments () tab is dedicated to creating and managing the labor assignments of the selected task, both soft and hard.
Upon clicking on the New button, the following commands are available:
Hard Assignment – Opens the Assign Resources dialog box, allowing the user to assign nominative resources to the selected task.
Soft Assignment – Opens the Soft Assignment dialog box, allowing the user to assign a soft resource to the selected task, allowing the user to either create a soft assignment, or assign a Generic Resource.
Each assignment is represented by a card.
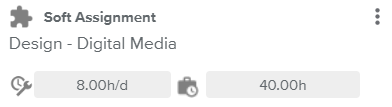
Soft assignment cards display the following attributes if they have been previously entered: Organization, Job Classification, and Skills. They also feature two editable fields: the assignment Rate and Total Effort.
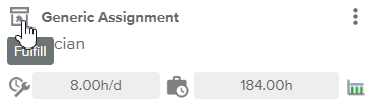
The soft assignment card displays either “Soft Assignment” or “Generic Assignment” depending on the way the assignment has been created.
Upon clicking on the More () button, the following commands are available:
Edit | Opens the Labor Assignment dialog box, allowing the user to modify the assignment attributes. |
Fulfill | Opens the Fulfill Soft Assignment dialog box, allowing the user to choose nominative resource(s) to assign. |
Delete | Allows the user to delete the assignment. |
Convert into Request | Opens the Create Allocation Request dialog box, which allows the user to request a Resource for the Soft Assignment. Upon completing the request, the Soft Assignment card will turn into an Allocation Request card. |
It is also possible to fulfill a soft assignment by directly clicking on the resource white and grey icon located on the left-hand side of the card.
The user can define whether the assignment is uniform or not as follows:
 | Uniform | Indicates that only uniform assignment is allowed. Upon clicking on this icon, the assignment allows non-uniform assignment. |
 | Non Uniform | Indicates that non-uniform assignment is allowed. Upon clicking on it, the assignment only allows uniform assignment. |
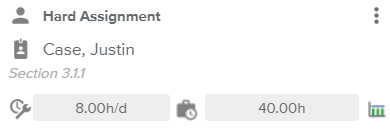
Hard assignment cards display the following information: the resource Name and its Organization branch. They also feature two editable fields: the assignment Rate and Total Effort.
If the Contract Type feature is enabled, External Resources will be flagged with the External ( ) icon.
Upon clicking on the More () button, the following commands are available:
Edit | Opens the Labor Assignment dialog box, allowing the user to modify the assignments attributes. |
Replace | Opens the Replace Resource dialog box, allowing the user to choose another nominative resource to assign in replacement. |
Delete | Allows the user to delete the assignment. |
The user can define whether the assignment is uniform or not as follows:
| Uniform | Indicates that only uniform assignment is allowed. Upon clicking on this icon, the assignment allows non-uniform assignment. |
| Non Uniform | Indicates that non-uniform assignment is allowed. Upon clicking on it, the assignment only allows uniform assignment. |
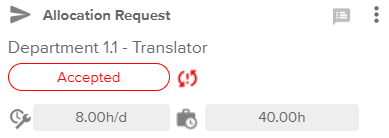
The Allocation Request card is generated using the “Convert into Request” command available upon clicking on the Soft Assignment card More () button.
Allocation Request cards display the name of the Organization and the Job Classification. They also feature two editable fields: the assignment Rate and Total Effort.
The following indicators are also available:
Workflow State | Indicates the Allocation Request Workflow State. Upon clicking on the Answered chip, the Allocation Request Details dialog box prompts the user to accept the Allocation. | |
 | Alert | Indicates that there is a Synchronization issue between the Total Effort and the Requested Effort and/or that the Request is Not Answered and the Assignment Start date is fast approaching. Settings The “Not Answered” alert is based on the value defined by the Administrator for the “Allocation Request Problem Granularity (days)” option (System Settings workspace, Resource Settings folder, Allocations & Commitments tab). |
| Notes | Indicates whether or not there are new notes, and opens the Notes dialog box. |
Upon clicking on the More () button, the following commands become available:
Edit Assignment | Opens the Labor Assignment dialog box, allowing the user to modify the assignment attributes. |
Edit Allocation Request | Opens the Edit Allocation Request dialog box, which allows the user to modify the Allocation Request attributes |
Sync. Requested Effort | Automatically updates the Requested Effort with the corresponding Soft Assignment Total Effort. This command is only available when the Total Effort no longer corresponds to the Requested Effort. |
Request History | Prompts a popup allowing the user to review the Allocation Request Workflow, as well as the Workflow History. |
Delete | Allows the user to delete the Allocation Request, as well as the corresponding Allocation (if any) and the initial Soft Assignment. |
The Transactions & Cost Items () tab has been designed to create and manage both cost items and transactions of the selected task.
Upon clicking on the New button, the following commands become available:
Create a Transaction | Opens the Transaction dialog box, allowing the user to define a new transaction for the selected task. |
Create a Distributed Transaction | Opens the Distributed Transaction dialog box, allowing the user to define a new time-distributed transaction for the selected task. |
Create a recurring Transaction | Opens the Insert Recurring Transaction dialog box, allowing the user to create several transactions at once. |
While both Saving and Cost Transactions are available in this section, the user will only be able to create Cost Transactions.
Each transaction assignment is represented by a card, which provides the Transaction Name, its Nature, its Amount and its Date (or Completed Date for time-distributed Transactions).
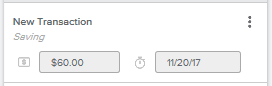
For each transaction, clicking on the More () button provides access to the following commands:
Edit | Opens the Transaction or Distributed Transaction dialog box, allowing the user to modify the transaction information. |
Delete | Allows the user to delete the transaction. |
At the bottom of the panel, the Transaction Cost Difference of the selected task is calculated as follows: Cost generated by transactions whose nature is “Cost” minus Savings generated by transactions whose nature is “Saving”.
Upon clicking on the New () button, the Assign Cost Items dialog box is automatically displayed, allowing the user to choose Cost Items to assign to the task.
Each cost item assignment is represented by a card, which provides the Cost Item Name, its Rate, and its Total Cost.
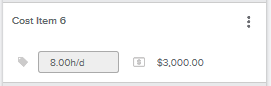
Upon clicking on the More () button, the following commands are available:
Edit | Opens the Cost Item Assignment dialog box, allowing the user to modify the assignment. |
Replace | Opens the Replace Cost Items dialog box, allowing the user to choose another cost item to assign in replacement of the current one. |
Delete | Allows the user to delete the assignment. |
At the bottom of the panel, the sum of the Cost Items Costs for the selected task is displayed.
The Work Objects () tab has been designed to create and manage the Work Objects of a selected Task.
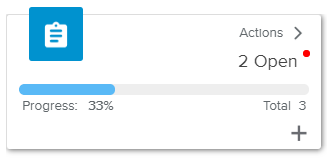
For each Work Object category, a card is displayed with the following information:
Work Object category icon.
Work Object category Name – Upon clicking on it (or on the arrow), the Work Items full screen view of the corresponding category (or the Risks full screen view) with a specific focus on the selected task will be displayed.
Number of open Work Objects for the category for the selected task. A red dot will be displayed if at least one Work Object in the category features one of the following alerts: Overdue, Planned beyond Due Date, and Estimated in the Past.
The Work Object category progress, by comparing the number of closed items against the total number of items for a given category.
 Add button – Opens the corresponding Work Item (or Risk) dialog box, allowing the user to create a new Work Object for the selected category (attached to the selected task).
The Links () tab provides all the relevant information regarding the selected Task Links.
The Filter Chain drop-down allows the user to decide which tasks linked to the selected task should be displayed among the following: Direct Predecessors, Direct Successors, All Predecessors, All Successors, or All Chain (i.e., All Predecessors and Successors).
Once a Filter Chain option has been selected, the button turns blue (active), and a Reset Filter button becomes available for the user to reset the Filter Chain option.

The "Filter Chain" option of the Gantt Task panel is linked to the "Chain Task" and "Chain Display Options" fields available in the Gantt Filters dialog box. Resetting one will also reset the other.
The user can create a new link for the selected task by clicking on the New () button. Upon doing so, a Task selector will be displayed, allowing the user to select the task to be linked.
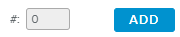
The user can also create a link by directly entering the number of the task to be linked and clicking on the Add button.
Upon doing so, the following error messages can be displayed:
Link Already Exists.
Cannot link the Task with itself.
Cannot create a circular link.
Task # was not found.
Each Predecessor and Successor task is represented by a card.
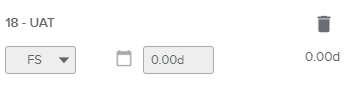
The Predecessor or Successor card provides the following information: #, Name, Logic of the link (editable), Lead/Lag (editable), and Total Float.
The Negative Float will be displayed in red.
Upon clicking on the Delete () icon, the corresponding link will be deleted.
The bottom section of the tab provides the number of days in the Predecessor chain and the Successor chain.
When several tasks are selected in the Gantt spreadsheet, then the side panel becomes an Assignment side panel, allowing the user to assign the same resource to several tasks at the same time.
The Quick Assign section provides tools to easily assign a hard resource or a generic resource to all of the selected tasks at once.
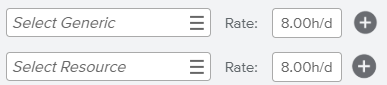
For both the generic resources options, clicking on the Browse ( ) icon prompts the list of corresponding resources that can be assigned to the selected tasks.
In the specific case of the Generic Resources, the user can access the Project Administration dialog box, Team folder by clicking on the More button located in the upper right corner of the prompted list.
Once the desired resource has been selected, the user can enter a Rate in the Quick Assign section corresponding field.
The Add () button is only available (highlighted in blue) if:
At least one elementary task is selected; and
A resource is selected.
In order to deselect a generic or nominative resource, the user can click the Remove ( ) icon. The Add () button is then disabled (highlighted in grey).
The default Rate values can be set by the Default Rate values entered in the System Settings workspace, Project Settings folder, Global Options tab.
Each selected task is represented in the Assignment panel in the form of cards.
The number of cards displayed depends on the value entered in the Set Scheduler Max. Number of Task Cards option (System Settings workspace, General Settings folder, Display Controls tab).
If more tasks are selected, bulk actions will still apply to all of them, but only the first ones will be displayed in the form of cards.
Soft assignment cards display the following attributes if they have been previously entered: Organization, Job Classification, and Skills. They also feature two editable fields: the assignment Rate and Total Effort.
The soft assignment card displays either “Soft Assignment” or “Generic Assignment” depending on the way the assignment has been created.
Upon clicking on the More () button, the following commands are available:
Edit | Opens the Labor Assignment dialog box, allowing the user to modify the assignment attributes. |
Fulfill | Opens the Fulfill Soft Assignment dialog box, allowing the user to choose nominative resource(s) to assign. |
Delete | Allows the user to delete the assignment. |
Convert into Request | Opens the Create Allocation Request dialog box, which allows the user to request a Resource for the Soft Assignment. Upon completing the request, the Soft Assignment card will turn into an Allocation Request card. |
It is also possible to fulfill a soft assignment by directly clicking on the resource white and grey icon located on the left-hand side of the card.
The user can define whether the assignment is uniform or not as follows:
| Uniform | Indicates that only uniform assignment is allowed. Upon clicking on this icon, the assignment allows non-uniform assignment. |
| Non Uniform | Indicates that non-uniform assignment is allowed. Upon clicking on it, the assignment only allows uniform assignment. |
Hard assignment cards display the following information: the resource Name and its Organization branch. They also feature two editable fields: the assignment Rate and Total Effort.
If the Contract Type feature is enabled, External Resources will be flagged with the External () icon.
Upon clicking on the More () button, the following commands are available:
Edit | Opens the Labor Assignment dialog box, allowing the user to modify the assignments attributes. |
Replace | Opens the Replace Resource dialog box, allowing the user to choose another nominative resource to assign in replacement. |
Delete | Allows the user to delete the assignment. |
The user can define whether the assignment is uniform or not as follows:
| Uniform | Indicates that only uniform assignment is allowed. Upon clicking on this icon, the assignment allows non-uniform assignment. |
| Non Uniform | Indicates that non-uniform assignment is allowed. Upon clicking on it, the assignment only allows uniform assignment. |
