In order to mitigate the Risk Factors, a Mitigation Plan can be created.
Log in to the HTML5 client.
Select the Projects Center workspace and open the Project Card.
Select the Risks Center workspace, Risks Grid.
Click on the Open button available on the right-hand side of the Risk Name to open the Risk Card.
Click on the
 button to display the Mitigation section.
In the Mitigation section, click on the MITIGATION PLAN button to open the Mitigation Plan popup.
Select the Mitigation Items sub-tab and click on the New (
 ) button to open the Mitigation Item popup.
Enter the Mitigation Item Name and other attributes if needed.
Click on the DONE button to close the Mitigation Item popup.
In the Mitigation section of the Risk Card, click on the MITIGATION PLAN button to open the Mitigation Plan popup.
Click on the MANAGE button to open the Risk Factors popup.
Select Mitigated for the values to be displayed.
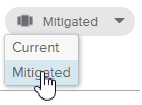
For each Risk Factor, select in each cell of the grid new Risk Factor Level values that would apply to the Risk were it properly mitigated.
Once completed, a Consolidated Mitigated Risk Level (from Risk Factors) is computed.
As the Project Manager, you have decided that this Mitigation Plan is worth pursuing as it tremendously decreases the Risk Level.
In the Risk Factors popup, select Mitigated for the values to be displayed.
Click on COPY TO MITIGATED the button.
The Mitigated Risk Level values are fulfilled automatically.
Close the different popups.