The Resource Fulfillment workspace helps Resource Managers fulfill and manage resource assignments on projects belonging to their organizations.
The Resource Manager can select the team through an Organization selector, to display all associated assignments (hard and soft) for a specific period of time.
The Resource Fulfillment workspace provides relevant information regarding the selected Organization(s) Resources and Soft Assignments. It allows the user to see the Resource overallocation at a glance by comparing each Resource Total Effort with its Available Effort from a task perspective for a selected time period. Once the project is unlocked, the Resource Manager will be able to fulfill a resource requirement at the task level with a nominative resource.
The Time Navigation toolbar that is provided impacts both the charts and the spreadsheet.
The workspace is made up of:
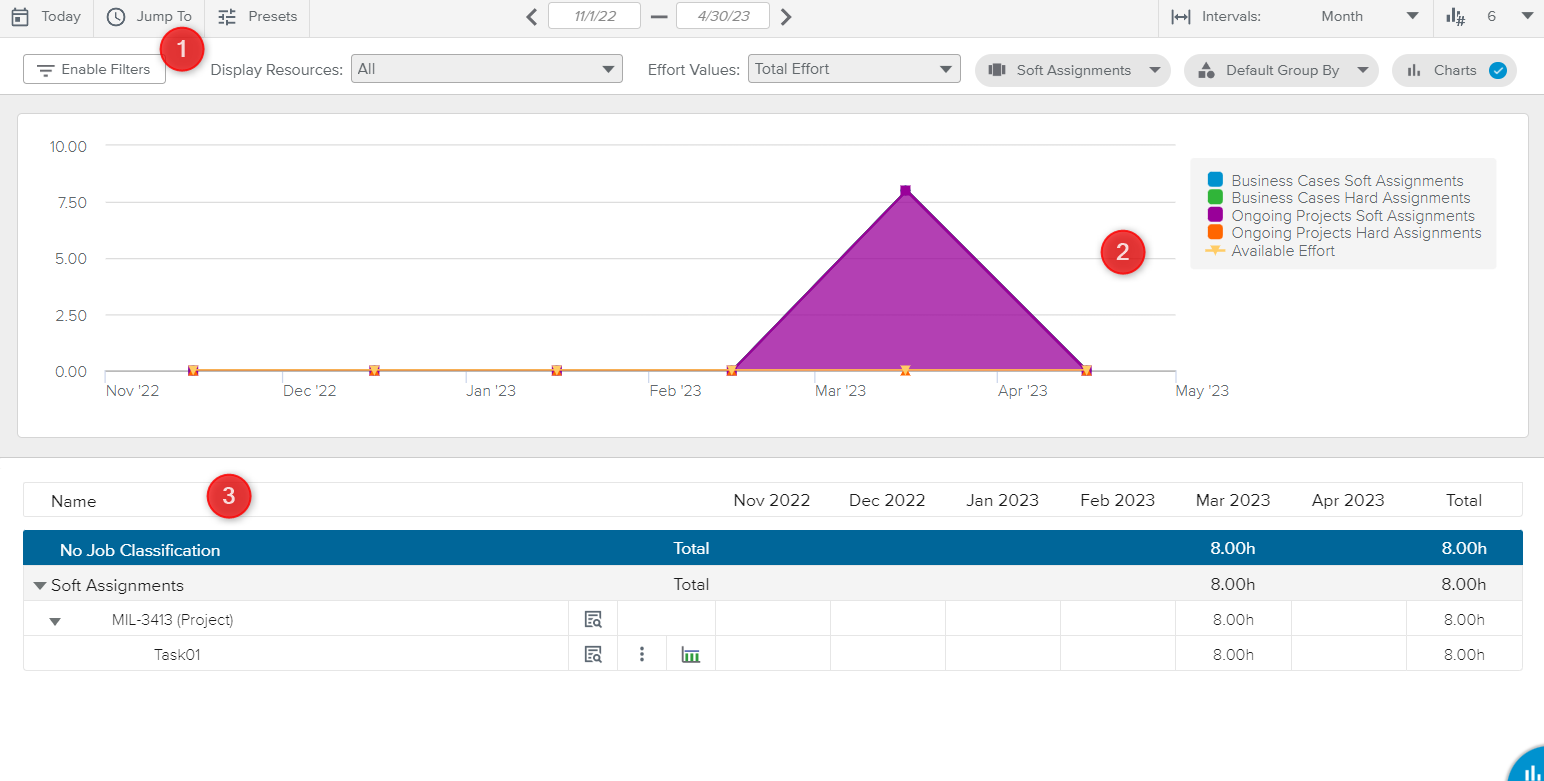
The Resource Fulfillment workspace main toolbar provides the following display options:
 | Enable Filters | Opens the Filters popup, which provides the following filtering options:
|
Display Resources | Displays Resources according to the option selected (All, With Effort in period, or Without Effort in period). | |
Effort Values | Displays Effort Values according to the option selected (Total Effort, Actual Effort, or Remaining Effort). | |
 | Display option | Displays Assignments according to the option selected (Soft Assignments, Hard Assignments, or All Assignments). |
 | Group By | Groups the Resources according to the option selected (Organization, Job Classification, or Contract Type). |
 | Charts | Allows the user to display a new section with a graph. |
The Charts section is available as soon as the Charts () display option (located on the right-hand side of the view, underneath the Time Navigation toolbar) is activated.
The Charts section allows the user to compare the Business Cases Soft Assignments, Business Cases Hard Assignments, Ongoing Projects Soft Assignments, Ongoing Projects Hard Assignments, Available Effort and Forecast Effort for the selected Organization(s) in a specific time frame.
The spreadsheet displays the list of nominative resources along with the corresponding Total Effort and Available Effort, as well as the list of Soft Assignments for the selected time period, grouped by Job Classification.
Colored indicators are provided to highlight the % shift between the Available Effort and the Total Effort. The user can access the legend of the colored indicators by clicking on the Legend ( ) button located in the bottom right corner of the view.
Colored Indicators are defined by the Administrator in the System Settings workspace, General Settings folder, Colored Indicators tab, Resource Utilization Preferences.
Upon clicking on the View Resource Brief ( ) button, the corresponding Resource Brief dialog box is displayed.
In addition, upon clicking on the View Project Brief ( ) button, the corresponding Project Brief dialog box is displayed.
At the Nominative Resource assignment level, clicking on the More ( ) icon provides the following commands:
Scroll into View | Modifies the time period so that the first date when the Effort > 0 for the assignment is displayed. |
Edit | Opens the Labor Assignment dialog box, allowing the user to modify the assignment attributes. |
Replace | Opens the Replace Resource dialog box, where the user can choose a new resource to assign instead of the current one. |
Delete | Deletes the corresponding Hard Assignment. |
At the Soft Assignment level, clicking on the More () icon provides the following commands:
Scroll into View | Modifies the time period so that the first date when the Effort > 0 for the assignment is displayed. |
Edit | Opens the Labor Assignment dialog box, allowing the user to modify the assignment attributes. |
Fulfill | Opens the Fulfill Soft Assignment dialog box, allowing the user to choose the nominative resource(s) to assign. |
Delete | Deletes the corresponding Soft Assignment. |
In addition, the user can define whether an assignment should be uniform or non-uniform:
 | Non Uniform | Indicates that non-uniform assignment is allowed. Upon clicking on it, the assignment only allows uniform assignment. |
 | Uniform | Indicates that only uniform assignment is allowed. Upon clicking on it, the assignment allows non-uniform assignment. |